
Free & open source · v0.1.0

From negative
to picture.

SMneg inverts film negatives you photograph with a digital camera. RAW or 16-bit TIFF in, lab-style printer-lights color, full-resolution JPEG or 16-bit TIFF out.

The apps are not code-signed: your system asks for confirmation the first time. How to open them · Release notes & checksums

Color photograph of a traditional Moroccan water seller in a red outfit walking among pigeons on a palm-lined square, converted from a film negative with SMneg.
Camera scan, converted with SMneg (S Curve tone). No retouching.

Before / After

Drag to compare the negative and the result.

Eleven frames from one roll. Pick a photo below, then drag across the image.
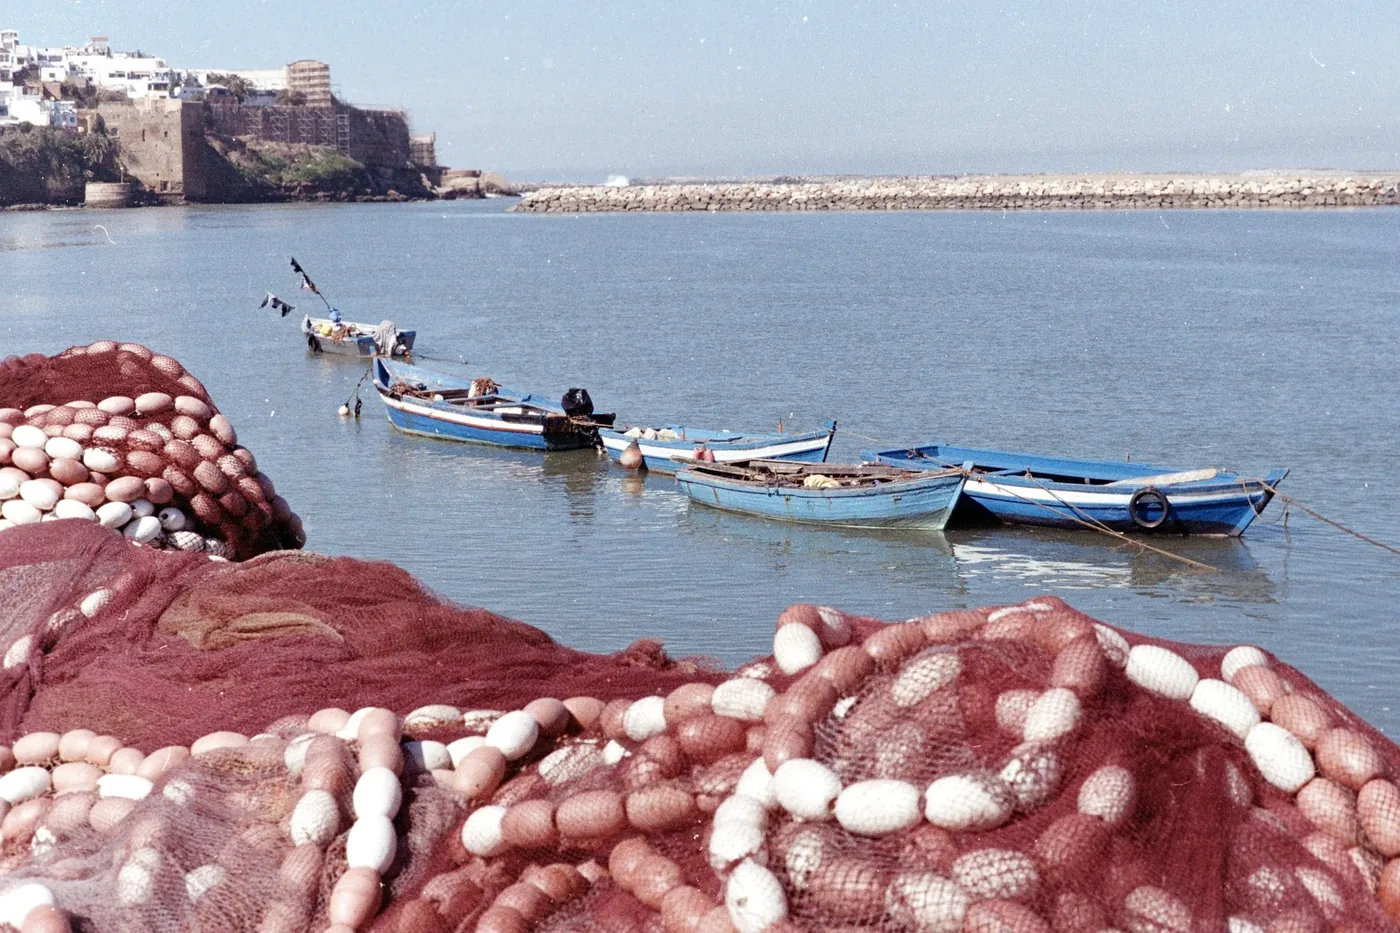
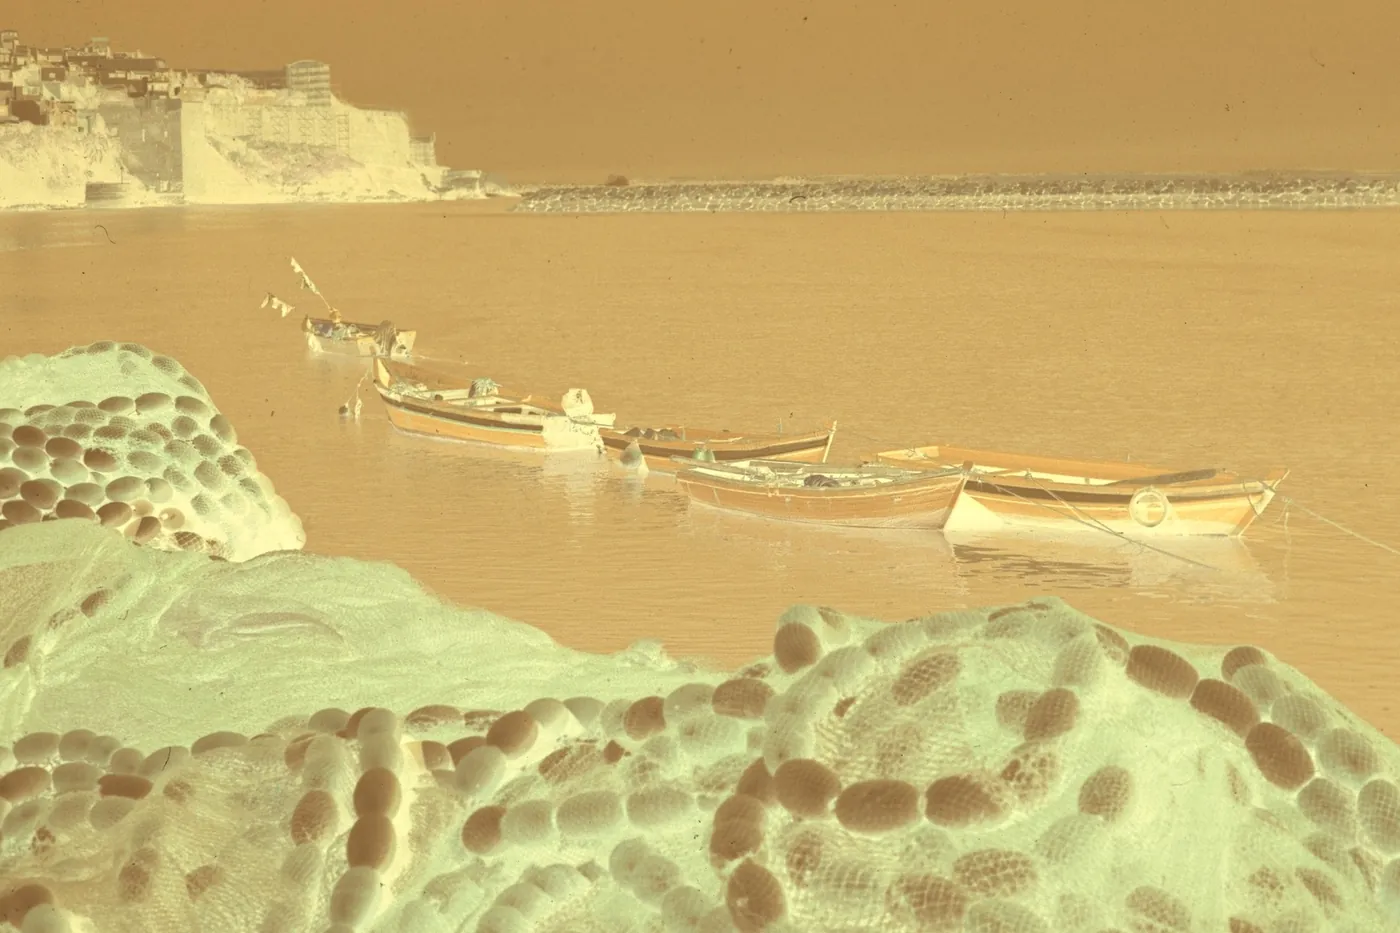
Boats and fishing nets, after conversion with SMneg. NegativeSMneg
01 / 11 Boats and fishing nets

Nikon Z8 camera scans of one roll, converted with SMneg using the S Curve tone profile. No other adjustments, no retouching.

What it does

Built for camera scanning.

In

RAW and 16-bit TIFF

Nikon NEF and NRW, Fujifilm RAF and DNG. 16-bit TIFF keeps its full precision.

Color

Printer lights

Correct like an analog enlarger or a Frontier: cyan, magenta, yellow and density, one key per step.

Roll

Whole-roll workflow

Hot Folder import while you shoot, copy-paste and Hold, crop, rotate and mirror, undo for every change.

Out

Full-resolution export

JPEG or 16-bit TIFF, files named from your session, with metadata embedded in every file.

See it in action

Open, correct, export. One minute.

Screen recording of the real app, SMneg 0.1.0 running from source, on six Nikon Z8 scans: open the roll, rotate, S Curve and printer-light correction, copy and paste across the roll, full-resolution export. Loading and export are sped up, as marked on screen. No sound.

Tutorial

How SMneg works, in ten slides.

Tutorial slide 1 of 10, How SMneg works: Cover: from the scan to the final file, with every keyboard shortcut.
Tutorial slide 2 of 10, Step 01 · Scan: Photograph the negative in RAW on an even light source; expose to the right without clipping.
Tutorial slide 3 of 10, Step 02 · Import: Open a roll with Select Roll Folder, or let Hot Folder import each new RAW as you shoot.
Tutorial slide 4 of 10, The interface: Toolbar, enlarged frame, per-frame C · M · Y · D values and status, and the control panel.
Tutorial slide 5 of 10, Step 03 · Correct: Printer lights: Q/A cyan, W/S magenta, E/D yellow, arrow up/down density, T tone, R reset.
Tutorial slide 6 of 10, Step 04 · The whole roll: Hold, copy and paste settings, crop and rotate, mark a frame Pass, undo any change.
Tutorial slide 7 of 10, Step 05 · Export: Export the roll with Cmd+E: JPEG or 16-bit TIFF at full resolution, named from the session.
Tutorial slide 8 of 10, Keyboard shortcuts: A keyboard map with every SMneg shortcut, colored by function.
Tutorial slide 9 of 10, Cheat sheet: All shortcuts grouped by color, density and tone, image, view, roll and export.
Tutorial slide 10 of 10, Your turn: Try it on your next roll: free for macOS (Apple Silicon), Windows and Python.
01 / 10

Install

Requirements and first launch.

macOS

macOS 11+ · Apple Silicon (M1 or newer)

  1. Open SMneg-macOS-arm64.dmg and drag SMneg to Applications.
  2. macOS 14 and older: right-click the app, then Open.
  3. macOS 15 and newer: System Settings → Privacy & Security, then Open Anyway.

Intel Mac: install from source.

Download .dmg

Windows

Windows 10/11 · 64-bit

  1. Unzip SMneg-Windows-x64.zip anywhere.
  2. Run SMneg.exe inside the folder. Keep the other files next to it.
  3. If SmartScreen warns: More info → Run anyway.

The Windows interface has not been checked on real Windows hardware yet.

Download .zip

From source

Python 3.10+ · macOS, Windows

git clone https://github.com/saidmrigua/SmNeg.git
cd SmNeg
python -m venv .venv
source .venv/bin/activate   # Windows: .venv\Scripts\activate
pip install -e ".[tiff]"
smneg

Or install the wheel attached to the release. Allow several GB of RAM for 45 MP frames.

Installation guide